Adding a new geodesic distance quotation
- Add a new geodesic distance quotation:
- Open the
Quotationspanel:
- Add a new geodesic distance quotation from the bottom bar of the
Quotationspanel: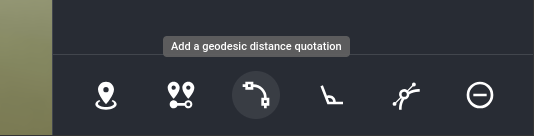
- Open the
- Place the first quotation point:
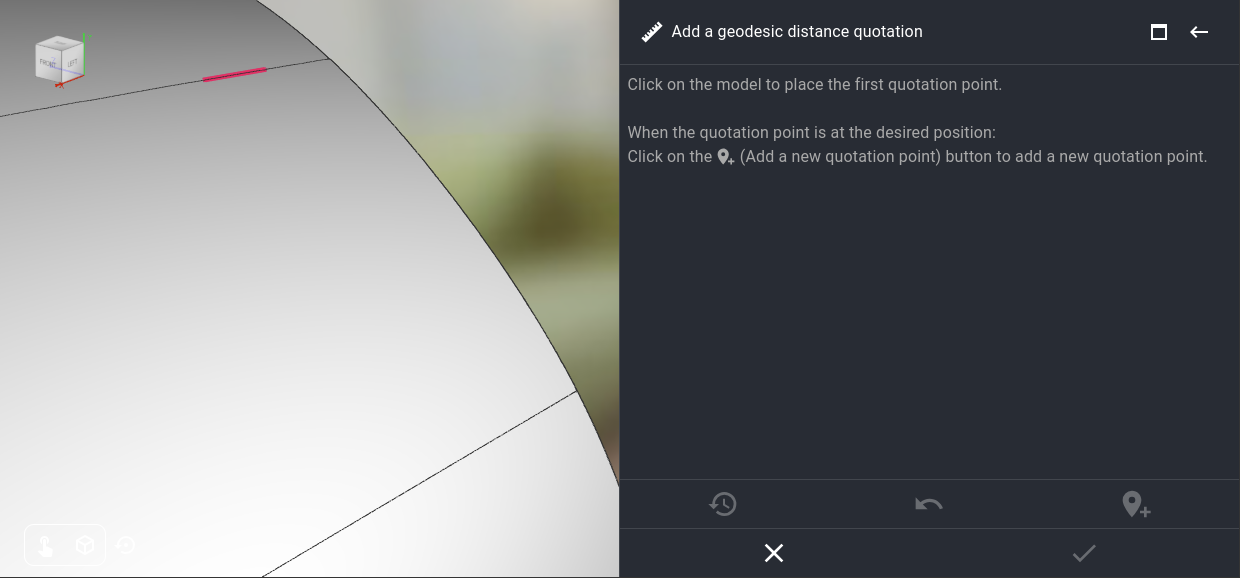
- Zoom-in to gain precision.
- Click on the model to place the point.
- Move the quotation point to adjust its position.
- Place the second quotation point:
- Click on the
Add a new quotation pointbutton: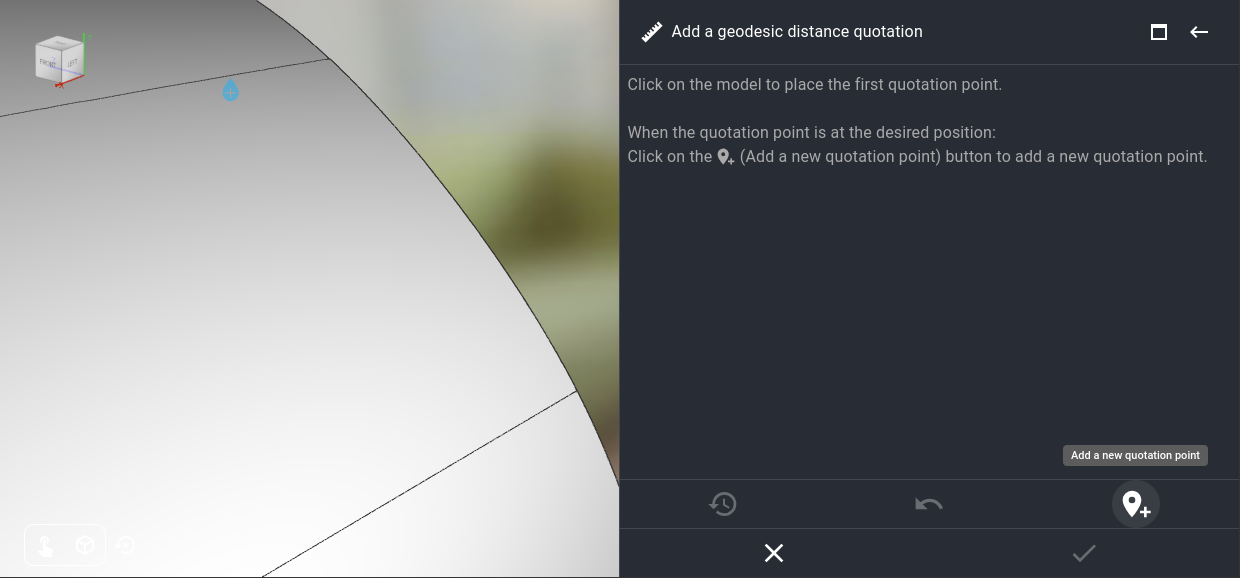
- The first quotation point will be duplicated.
- Move the new point to the desired location:
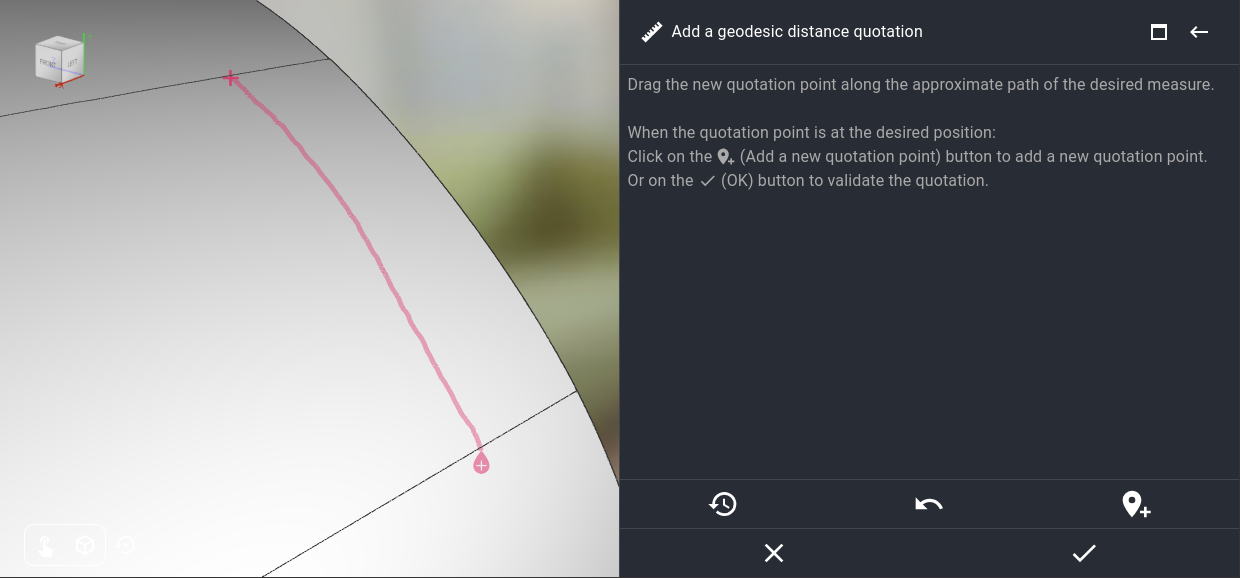
- Drag the point on the model.
- Follow the approximate path of the measure.
- This path will be drawn on the model, until the point is validated.
- It will only be used to get the geometries of the objects under the path of the measure. Those geometries are required to compute the measure.
- It will not be used to guide the actual measure.
- There is no need to be accurate, just make sure to pass over every object that will be measured.
- If necessary, use multiple steps, zoom and move the camera.
- You can use the
Undo the last quotation pointbutton to reset the point position.
- Click on the
- Place another quotation point, or validate the quotation points:
- You can now add a new quotation point, by repeating the step 3.
- Or you can validate the quotation points.
- You can also use the
Undo the last quotation pointbutton to delete the last quotation point. - Or the
Reset the entire quotationbutton to restart from the first point.
- Finalize the quotation:
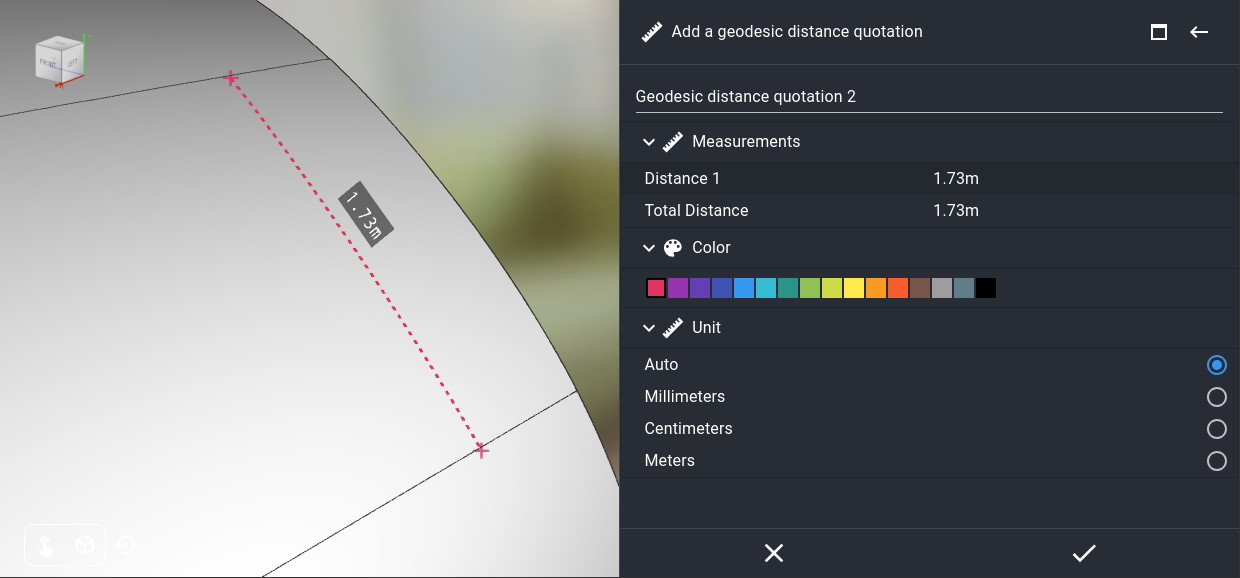
- Read the measurements (distance between every quotation points, and total distance).
- Edit the quotation name, color and unit.
- Then validate the quotation.
May 2, 2024
May 2, 2024